In Sage X3, the import of data can be given for multiple cases, the most common are usually during the migration of master data, transactions from another system before going to production and also to globally update certain groups of data. In this post, we will show you how to import such data.
Índice de contenidos
How to import data into Sage X3
In sage x3 We must take into account two important aspects to import data: new records can be created or they can also be updated. The system will try to load the record through its identification code before creating it. If it finds it, it will update it and if not, it will create it.
You can enable or disable the option in the template from: Parameterization > Use > Imports /Exports

Importing ledger accounts in Sage X3
We will start from something very basic, we will import the various accounts (GESGAC function)
To do this we will follow the following steps:
1. Checking data in Sage X3
We will do a manual check about which data is mandatory for the function to import GESGAC and also those that are not used in our common processes. The function path from the menu in Sage X3 is: All > Base data > Accounting tables > Supplier.
We capture a couple of records, and we can see that the required fields are:
- plan code
- Bill
- Classification
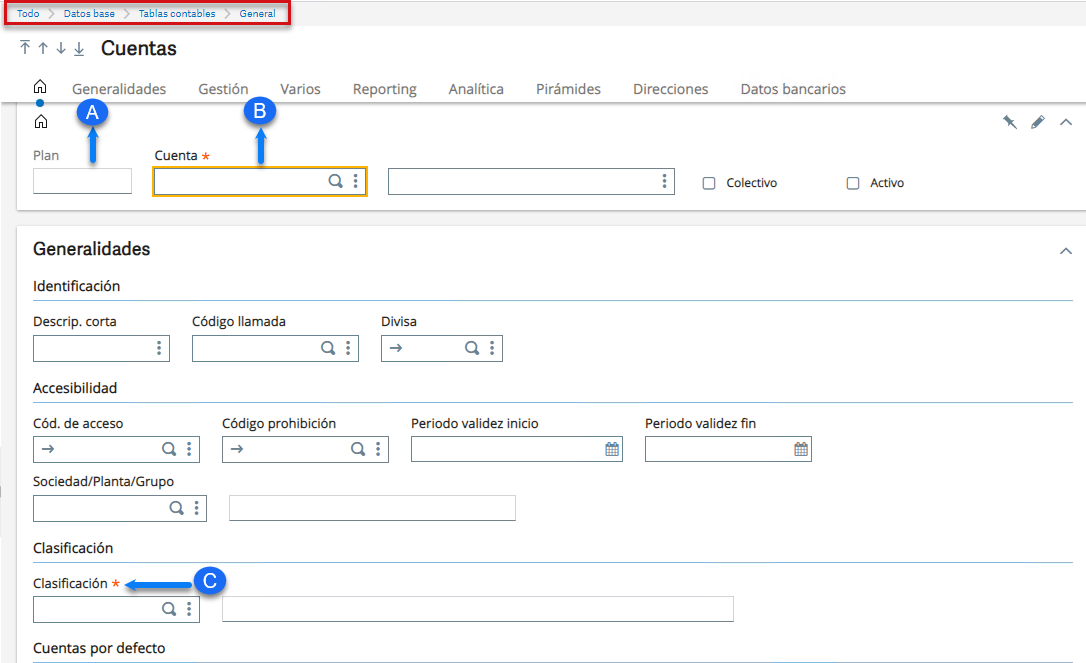
In addition to the mandatory data, we will include 2 fields as we consider them important:
- Description
- Short description
2. Import model copy
We will select one of the models that Sage X3 offers us for the import/export of various accounts, in Sage X3 GESAOE function from the menu: All > Parameterization > Use> Imports/Exports > Import/export models.
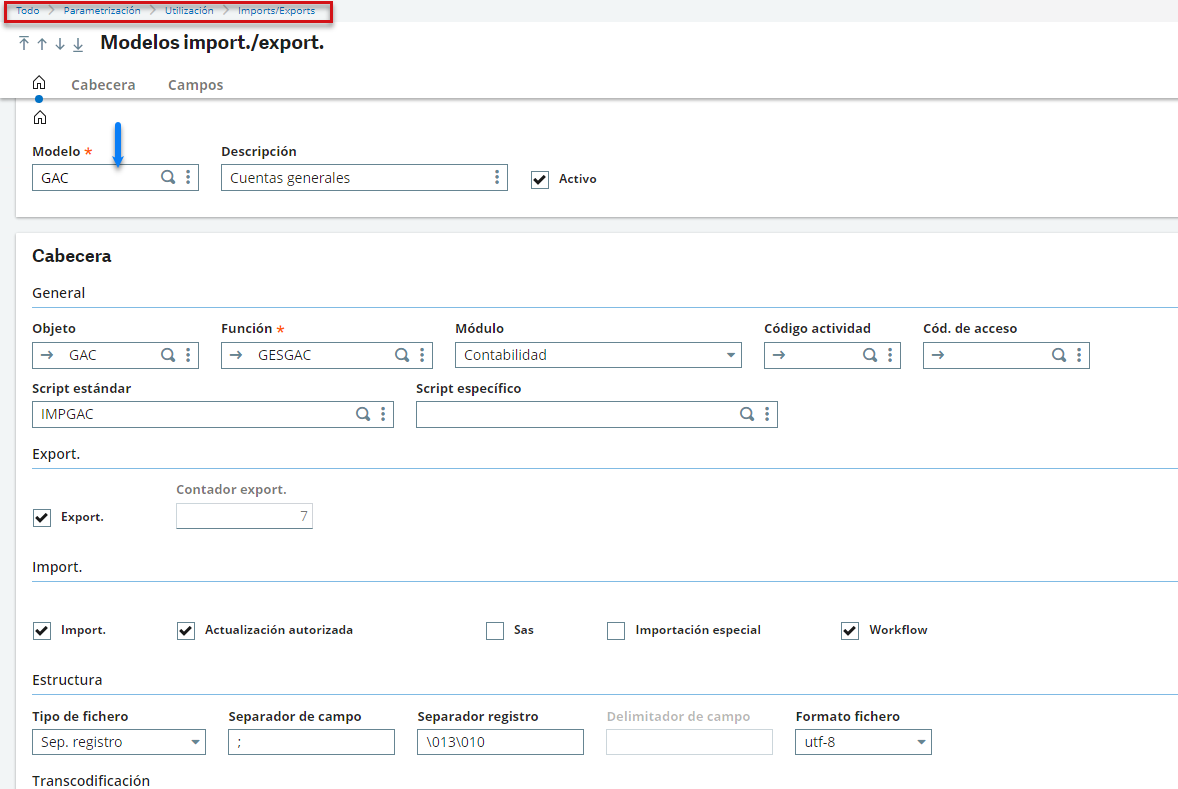
The model that we will use is GAC- General Accounts. A good way to work with it, without changing the original values offered by Sage X3, is to make a copy of it by adding a "Z" to the beginning of the name, and we have also indicated a personalized description for the copied model.

We make sure that our copied model has the Export, Import and Authorized Update checkmarked. Also, that it has the file structure indicated in the image.
3. Adapt the copied model ZGAC
We adapt the model with the necessary fields by clicking on the dots next to the indicator field and selecting the option Suppress.
4. Export reference data
Using the GEXPOBJ function or from the menu: All > Use > Imports/Exports > Exports, we export the information using the ZGAC model.
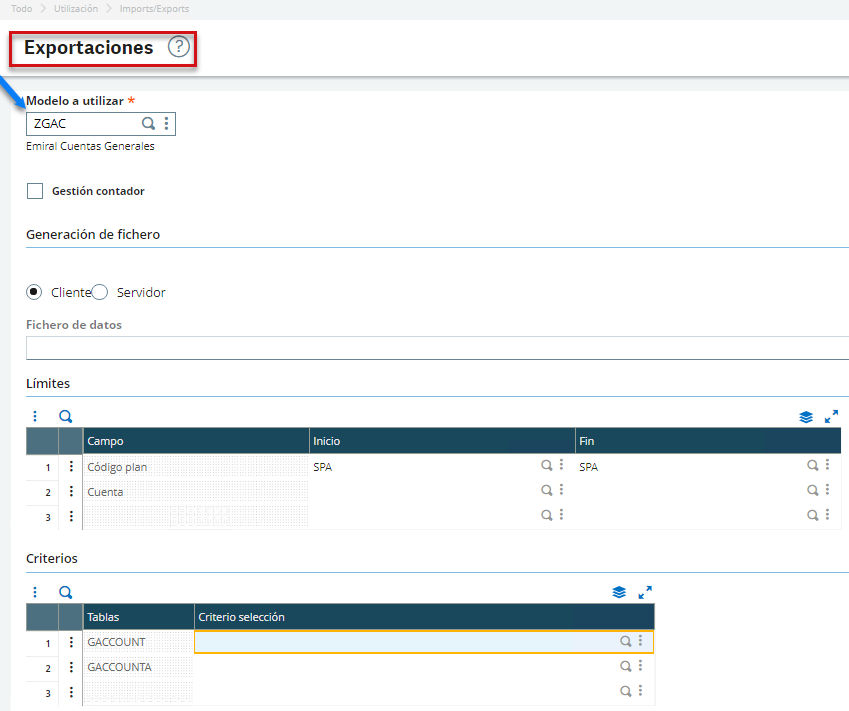
The file of the export done will help us to have a reference of how to order our information to be imported.

5. Sort the data to import
We order the information, our example is very simple, we will include the list of various accounts.
Due to the type of editor we are using, before importing we must select all the fields of the file, click on Coding and select convert to UTF-8 and click on save.
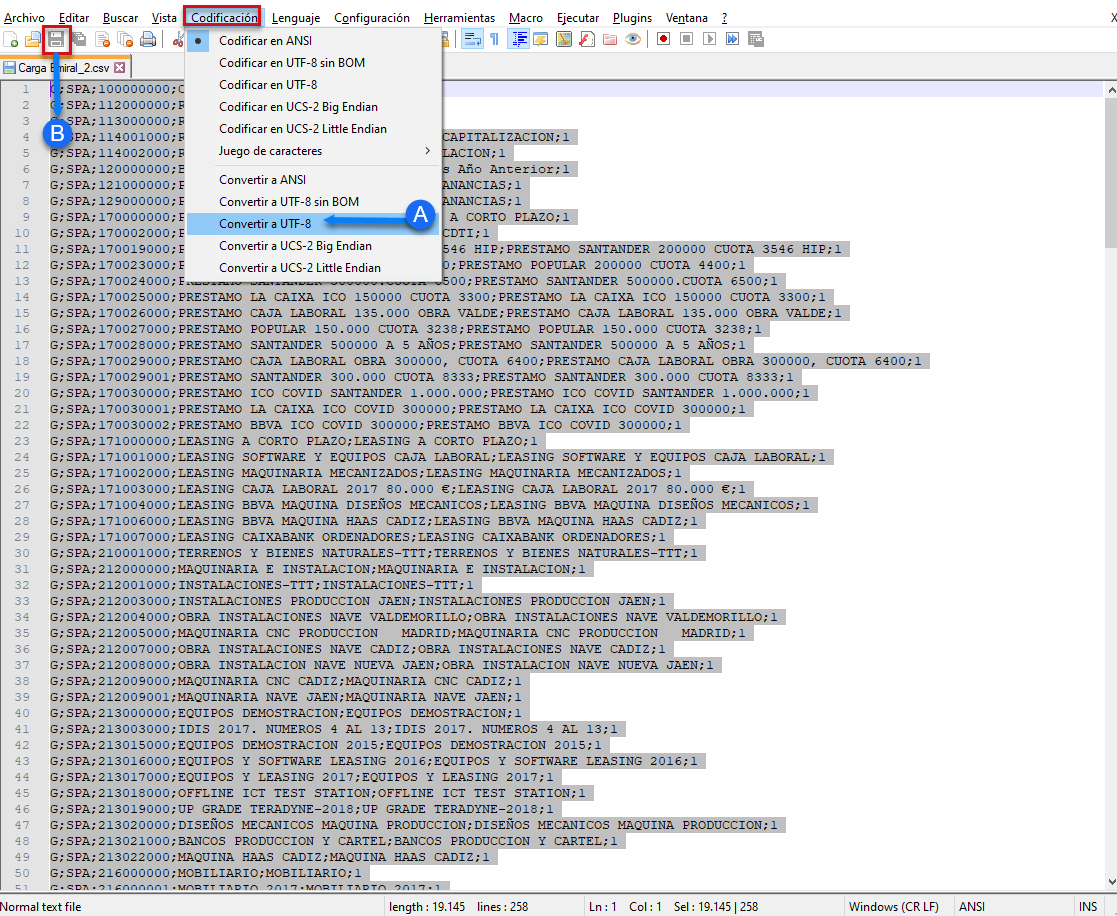
6. Start with the import
We select the ZGAC model from the GIMPOBJ function or from the menu: All > Use > Imports /Exports > Imports.
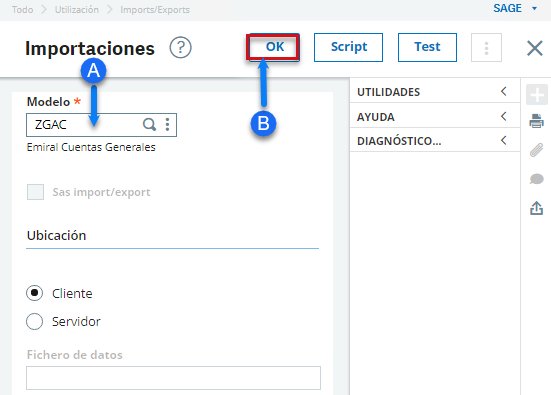
Once the file to import is selected, click OK.
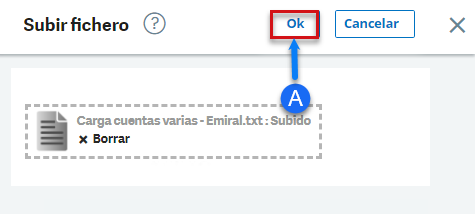
The loading time will depend on the amount of information included in our file.

Once the time has elapsed, the system will give us a detail of the result of the load. In our example we have had no errors.

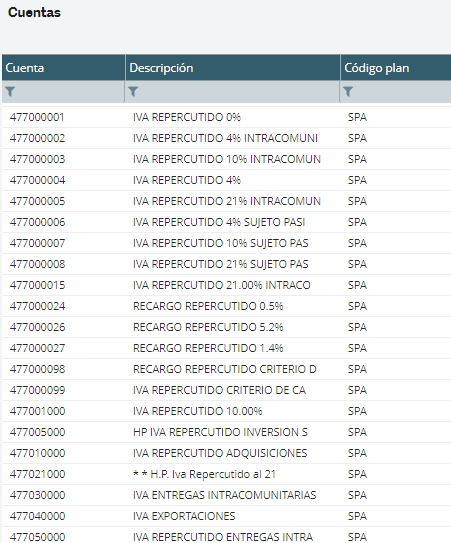
As a last step, we will check the information that has been imported, using the GESGAC function. In this case, 258 accounting accounts have been imported.
Do you want to implement an ERP in your company?
We help you!
In Emiral We know how much your company is worth, whether it is small, medium or large. For this reason, we want to offer you the best ERP management solutions so that your business continues to grow.


