1. Activate “Credit Management” feature
The first step is to activate the “Credit Management” feature in order to have all the functionality available for your use. This characteristic allows having different credit limits for a single client (credit limit of the insurer, credit limit of the company itself with that client...) and the sum of them will be applied as a limit. To activate it, we will go to the "Features management" workspace and activate the one called "Credit management".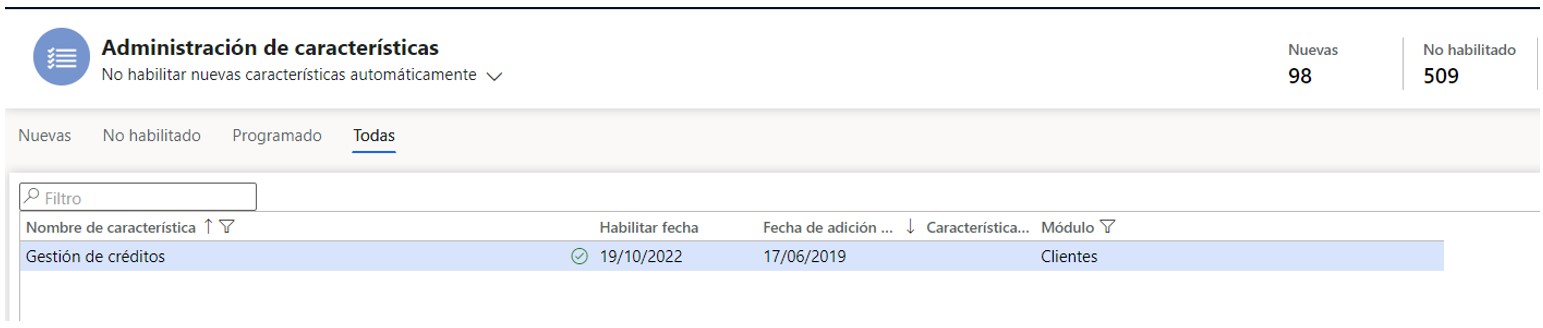
2. Credits and collections
Once the feature is activated, we can go to the all customers form (Customers > Customers > All customers) and clicking on any of them we will go to the "Credit and collections" section in which we will see many more fields than we they were previously prior to feature activation.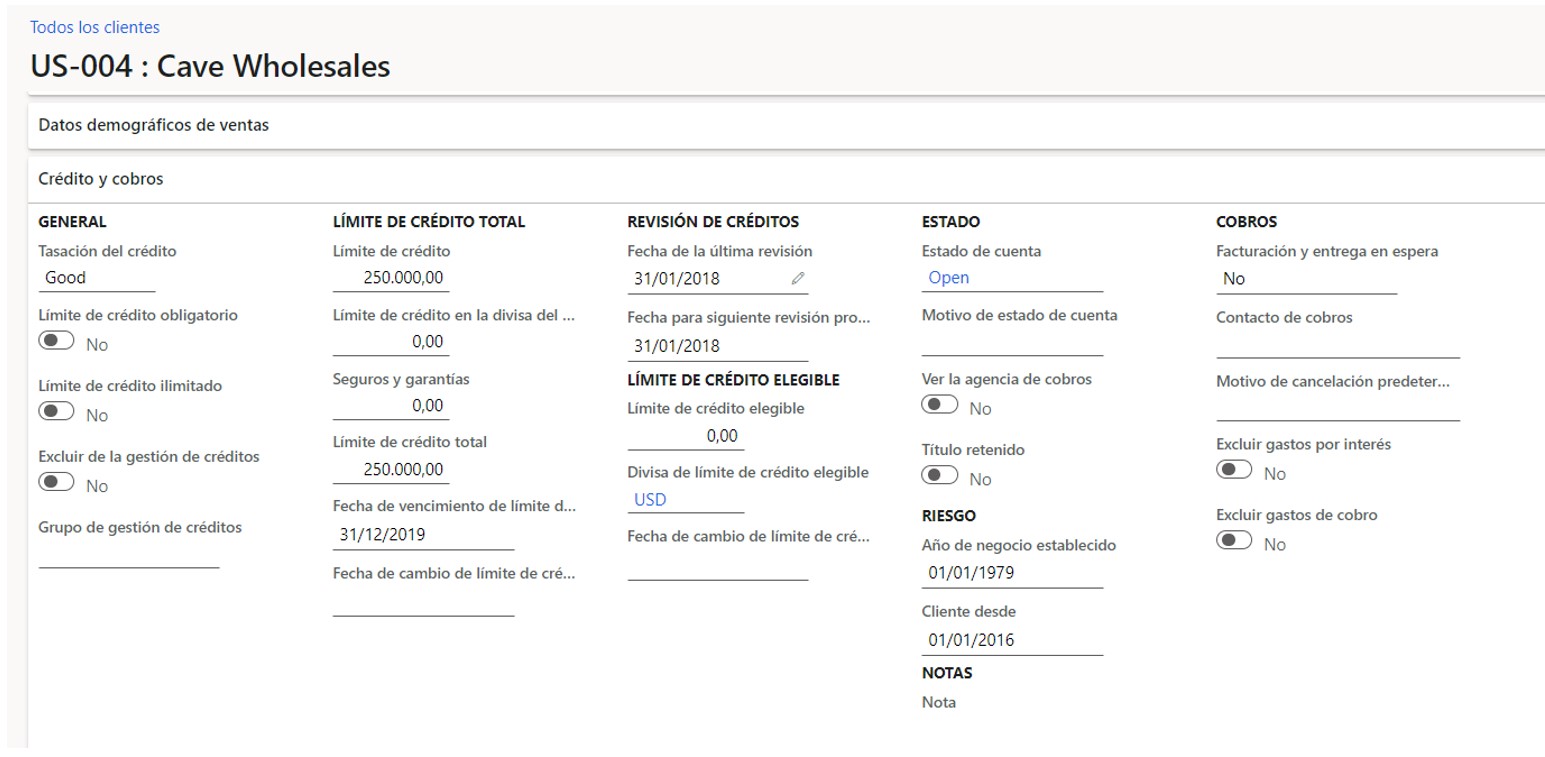 New relevant fields:
- Mandatory credit limit: To control the credit limit configured for this customer.
- Unlimited credit limit: The customer will have an unlimited credit limit regardless of the amounts in the credit limit.
- Exclude from credit management: So that this client is not taken into account in the credit management section.
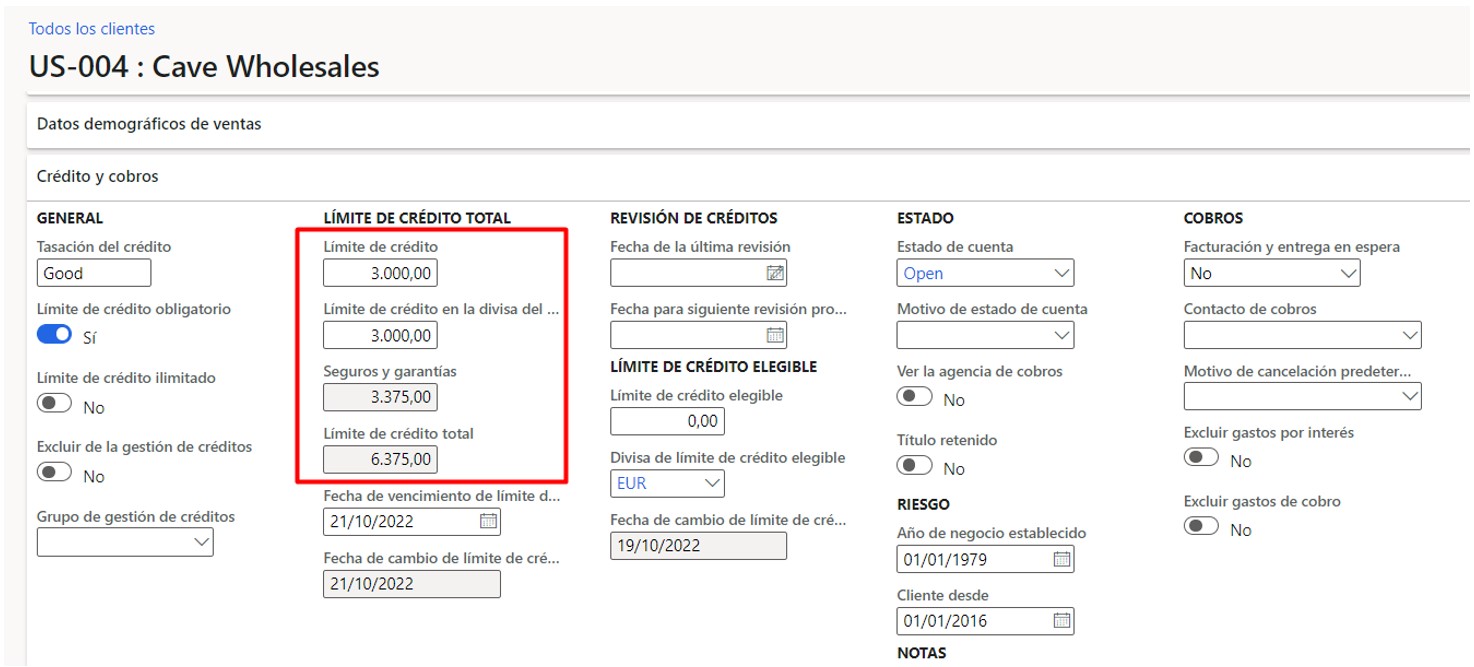
- Credit limit and currency credit limit: It is the credit limit established in the company's currency and with the exchange rate to the client's currency.
- Insurance and guarantees: It is the limit established by the insurance company and the guarantee company, it is explained in more depth in the next section.
- Total credit limit: The sum of the credit limit and the insurance and guarantees.
- Credit limit expiration date: Date until which the credit limit is effective.
- Credit limit change date: This is the date the customer's total credit limit was last modified.
- Account status: In this field we will establish the state in which the client is and what we will allow to do with it.
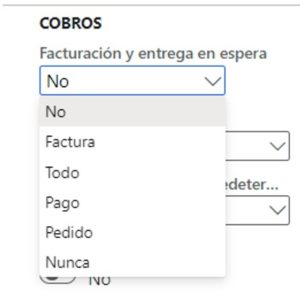
 In this case, if the account statement is openi.e. the Billing & Delivery field awaiting is No, we are allowing everything against this customer. If we select the option All that would be the example hold we would not allow anything to be recorded against this client. The invoice option is to not allow to register new invoices against the client.
- Billing and delivery on hold: It depends on the value reported in the Account Status field and is used to establish different levels of blocking depending on what you want to avoid registering for the customer.
3. Insurance and guarantees
To access the Insurance and guarantees form mentioned above, we will go from the client for which we want to configure it and click on the "Credit management" section > Related information > Insurance and guarantees.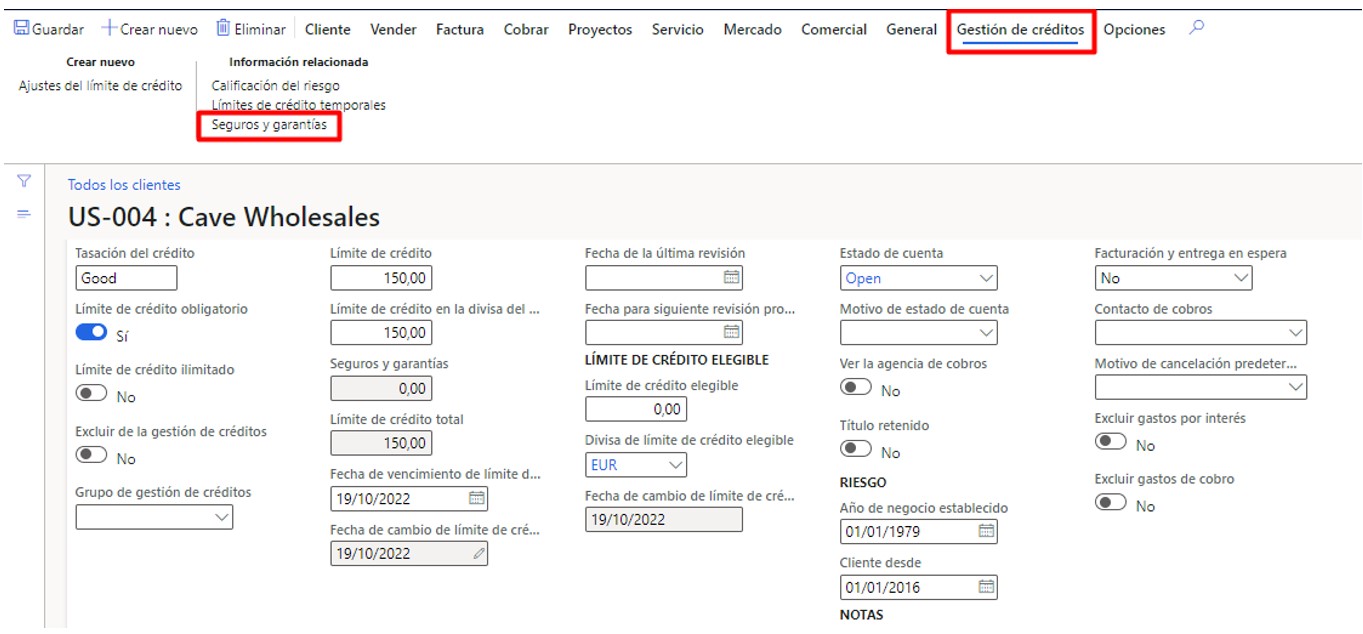 In this form we will fill in the insurance and guarantees that we have contracted for the selected client.
 Explanation of the fields:
- Insurance or guarantee identifier: To indicate if it is insurance or a guarantee.
- Type of insurance or guarantee: It is used to indicate the type of insurance or guarantee, you can create the types that are needed.
- Insurer/guarantor: It is used to link the supplier to the insurance or guarantee.
- Cover Type: It is used to indicate the type of coverage, you can create the types that are needed.
- ID: Name of the insurance or guarantee.
- Valid and Expiration: Date from and to when the insurance or guarantee is effective.
- Worth: Insured or guaranteed amount.
- Badge: Currency in which the amount is calculated.
- Increase percentage of credit limit: Percentage of the value that is going to be added to the credit limit, we will put 100.00 if we want the complete “Value” to be added.
- Included in the exhibition: If we mark the check, it serves to reduce the credit limit that is used in credit limit calculations.
4. Credit limit error
When trying to register an invoice for said customer that exceeds the credit limit, the error shown in the following image appears and does not allow the invoice to be registered.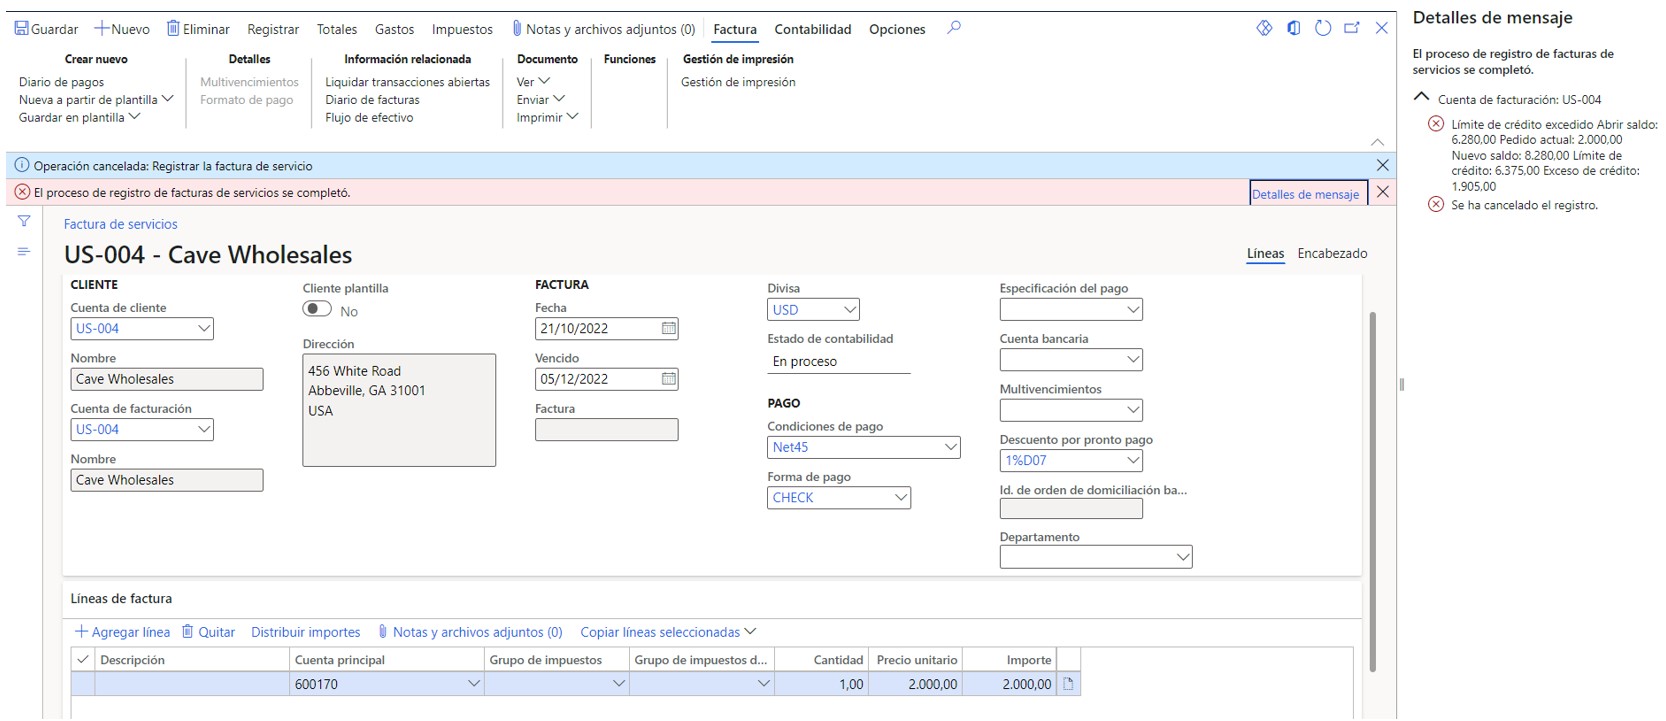
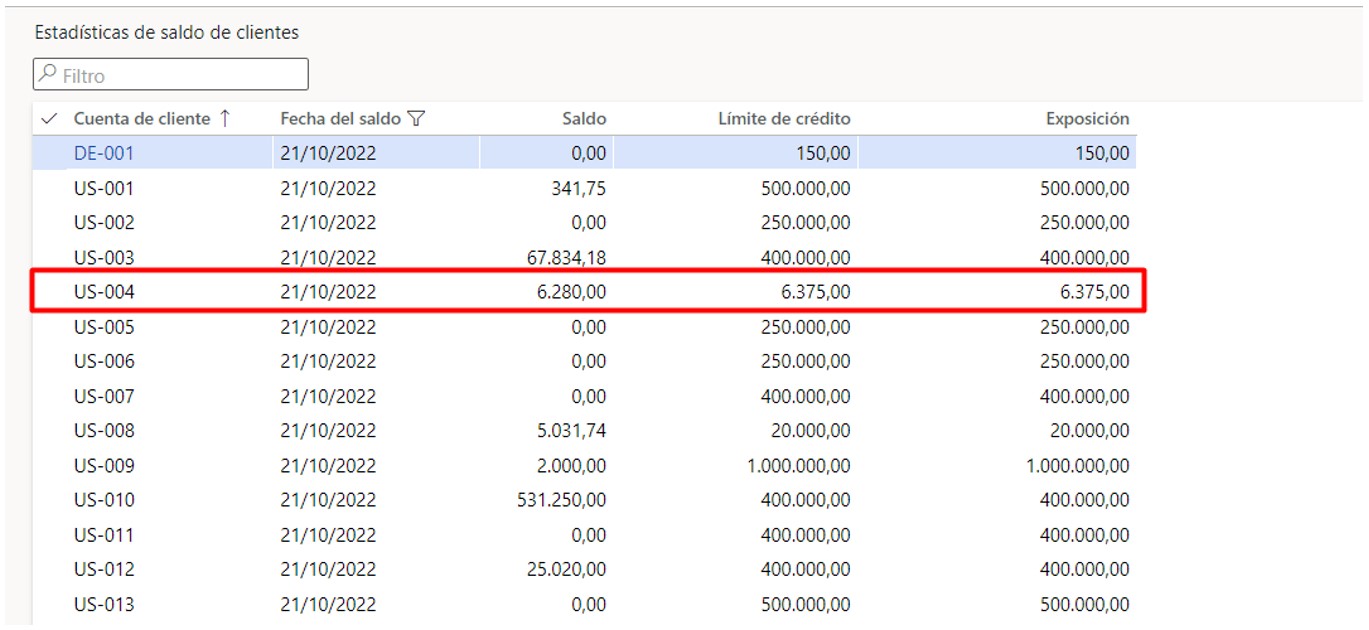
5. Reports
In the route: Credits and collections > Queries and reports > Credit management > Customer balance statistics, you can check the limits established for each of the customers, as well as the balance used: