If you develop in Dynamics 365 D365FO and you work from home, you may have a development virtual machine on your computer (“host”). In this case, when you want to test something, you have to do it from the same “host” computer.
Scenery
If for some reason you need to do the tests, or even develop, from another "client" computer (for example: you have the VM hosted on a relatively old computer but you move around the house with your laptop, or the VM is hosted on a professional computer but you have your personal laptop), you can access the VM from your "client" computer as if you were on the "host".
What do you need?
To do this, you will need:
- Access to the virtualization manager of the “host” computer (in this example, it is Hyper-V)
- Access to the home router (administration username and password)
- Your “client” computer
It may also be that the VM you work with is not at home, but is, for example, on your company network, to which you connect via VPN. In that case, you will only need to know the IP address of your virtual machine and make settings on your client machine.
With a few adjustments, you'll have it.
Settings on the computer host
Assign static MAC to the VM
With these settings we will fix a physical address to the virtual machine and we will make its network traffic be managed by the router as if it were a “physical” machine. They are geared towards the Hyper-V virtualization platform, but any other platform should have an equivalent.
- Create a new Virtual Switch in Hyper-V. This step is optional and we can use the one we already have, but it will allow us to control it separately on the “host” machine and easily fall back in case of a “disaster”:
From the Hyper-V manager, create a new external virtual switch, selecting the one we usually use as the “physical” network interface (in this case, the Wi-Fi network). Once created, we should see this in the virtual switch manager:

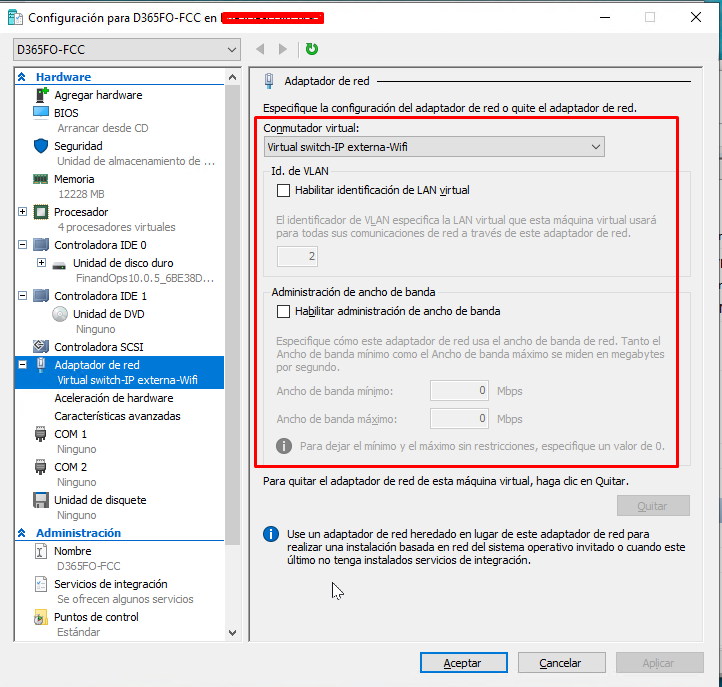
We return to the VM configuration and in «Network adapter», we change the virtual switch so that it uses the one we just created. We leave “Enable virtual LAN identification” and “Enable bandwidth management” blank:
- In “Network adapter > Advanced features”, we assign a static MAC (physical address) to the VM, and leave “Enable MAC address spoofing” blank. It can be a random one, or any other as long as it doesn't conflict with an existing one. In my case, I have chosen a simple one to remember (AA:00:BB:11:CC:22):

At this point, if we've done it right, the VM will behave, from the outside, exactly like a physical machine, and will use the same gateway as its physical host machine (usually the home router).
Assign fixed IP to the VM
The next step is to make sure that when the VM starts up it always has the same IP address assigned within our local network, and to be able to refer to it from any device connected to our LAN, and not only from the “host” machine. For it:
- Assign fixed IP within the LAN of the home router for the MAC of the VM. You may have done it before. If not, you have to:
- Find out the IP of the router. It is the gateway of any device connected to it. To do this, we open a command window (exe), launch the ipconfig command, and look for the IP address of the gateway (in IPv4 format):
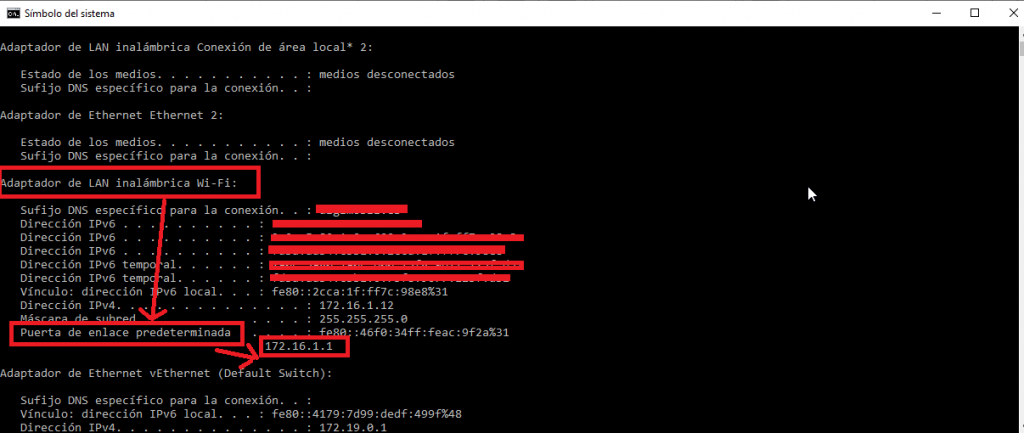
Or, even simpler, launch a traceroute (tracert.exe) to some well-known site. The address of the first hop should be that of your router:

- Access the router configuration. There are some models that allow you to do it via Telnet or SSH, but normally they have a web interface. If this is the case, we open a browser to the address http://RR.RR.RR.RR, where RR.RR.RR.RR is the gateway address we obtained above. Once we enter the configuration, we must look for the “DHCP Assignment”, “Static DHCP” or equivalent option of the router (this already depends on the router model) and activate it:
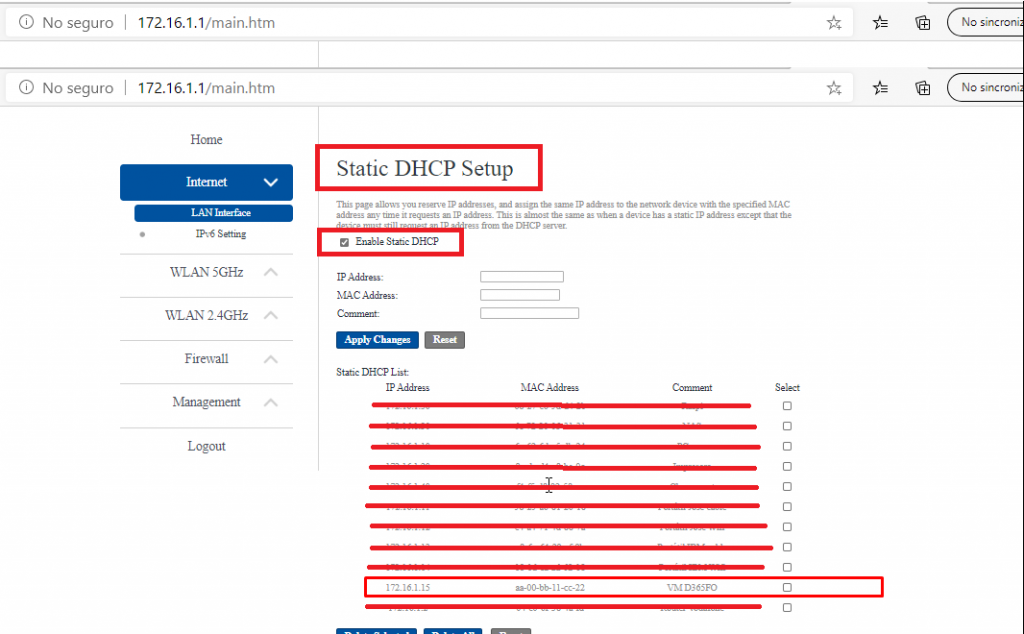
and choose an IP address that is not already occupied within the address range of the router. We will assign this IP address to the MAC address that we have assigned in step 2.
Normally, routers are configured for the 192.168.XX address range. In my case, I have it assigned to the 172.16.XX range, and I have chosen the 172.16.1.15 address for the physical address of the VM:
![]()
Save the settings you just made. You may have to restart the router to make them effective. Good time for a little break...
Settings on the computer client
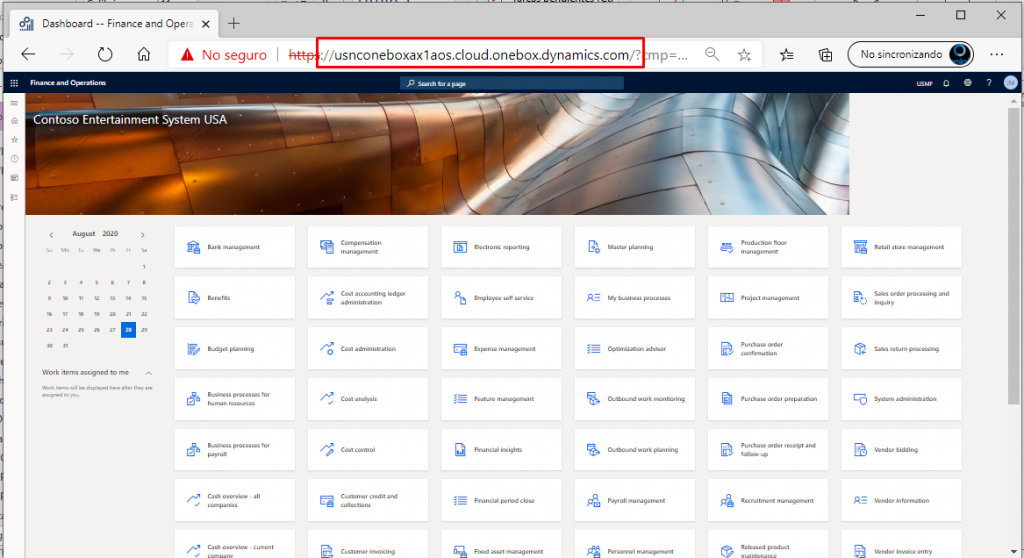
The purpose of these settings is that from the “client” computer you can reference the VM with its DNS name (usnconeboxax1aos.cloud.onebox.dynamics.com).
Modify Windows hosts file
- Modify DNS entries on the client computer. This will allow us to connect directly to the VM without the need to be physically on the host machine that hosts it when we try to access the D365FO web client by its URL (https://usnconeboxax1aos.cloud.onebox.dynamics.com/).
To do this, open the Windows hosts file with a text editor (in administrator mode, otherwise it won't let you save it later) (normally located in C:WindowsSystem32driversetchosts), and add the following entries:# VM 365FO
XX.XX.XX.XX usnconeboxax1aos.cloud.onebox.dynamics.com
XX.XX.XX.XX usncax1ret.cloud.onebox.dynamics.com
XX.XX.XX.XX usnconeboxax1ret.cloud.onebox.dynamics.com
XX.XX.XX.XX usnconeboxax1pos.cloud.onebox.dynamics.com
XX.XX.XX.XX usnconeboxax1ecom.cloud.onebox.dynamics.com
XX.XX.XX.XX usncax1ecom.cloud.onebox.dynamics.com
XX.XX.XX.XX usncax1pos.cloud.onebox.dynamics.com
XX.XX.XX.XX retailhardwarestation.cloud.onebox.dynamics.com
XX.XX.XX.XX is the IP address that we have assigned to the VM in step 3, or the one that we have been given to access if the "host" computer is not at home.
After this, we should already be able to access, from our client computer, D365FO from the browser, with the same credentials that we use from the physical host machine:
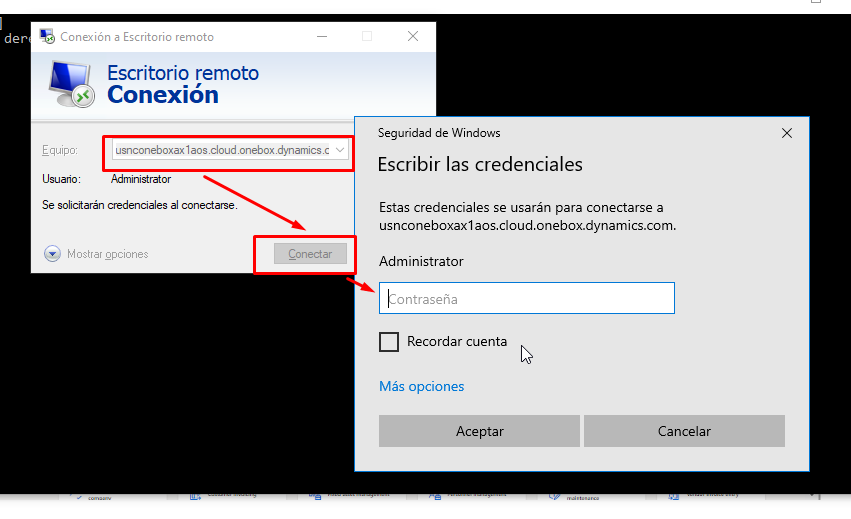
Additionally, you will be able to work “remote” (from your “client” computer) doing Terminal server against the development VM, just as you would from the host computer when connecting to the VM:
Do you want to implement Dynamics 365 in your company?
We help you!In Emiral We know how much your company is worth, whether it is small, medium or large. For this reason, we want to offer you the best ERP management solutions so that your business continues to grow.
- Modify DNS entries on the client computer. This will allow us to connect directly to the VM without the need to be physically on the host machine that hosts it when we try to access the D365FO web client by its URL (https://usnconeboxax1aos.cloud.onebox.dynamics.com/).